How to Clean Metal Detecting Finds Without Damaging Them
As an Amazon Associate we earn from qualifying purchases. Some links on this page are affiliate links, which means we may earn a small commission if you make a purchase.
On a corroded copper-alloy coin, the surface detail is everything: the fine lines of a monarch’s portrait, the lettering of a legend, the small mint marks that date it. These features sit in the topmost layer of the patina, the part that aggressive cleaning destroys first. Understanding this physical reality—that you are working on the object’s information layer—is the foundation of safe cleaning.
This guide covers the gentle method that protects your finds, and explains why knowing when to stop is more important than any tool you can buy.
The Initial Assessment
Before you touch water, a toothbrush, or anything else, stop and look at what you have found. This is not a bureaucratic step; it protects both the find and you.
📺 Watch: How To Identify British Hammered Coins - An Ultimate Beginner Collectors Guide — The Britannia Coin Company of Royal Wootton Bassett
Think of it as a decision tree: Is it a common modern coin, a button, or a bottle cap? Is it clearly a mass-produced modern object with no historical interest? If the answer to both is yes, gentle cleaning is reasonable. If the answer is no—it looks old, it is corroded in an unusual way, or it has decoration or an inscription you cannot identify—stop there.
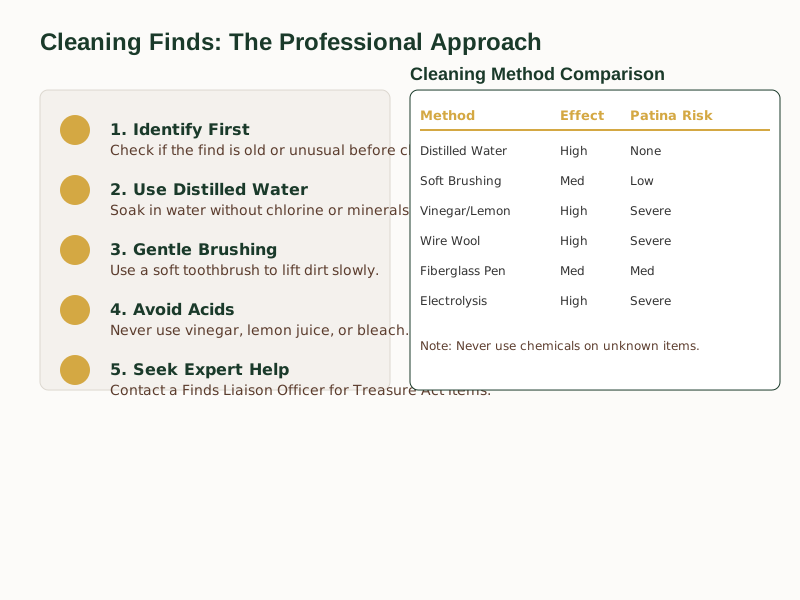
Anything that might be old, unusual, or potentially significant under the Treasure Act 1996 should not be cleaned until you have spoken to your local Finds Liaison Officer (FLO). The FLO is there precisely for this situation. They can advise on whether the find needs to be reported, and whether cleaning is appropriate. For anything that looks like it might be Treasure Act material, the answer to “should I clean this?” is no—not until a qualified person has assessed it.
If you believe a coin may be rare, cleaning is strongly discouraged, as it can permanently damage the surface and significantly reduce its value. Identification comes first, and it is the identification that decides what happens next. Cleaning is not a neutral step that can always wait until afterward; on the wrong find, it is an irreversible act of damage.
Understanding Aggressive Cleaning Risks
The gunk on a find is frequently not just dirt. Buried metal develops a patina—copper oxide on bronze, silver sulphide on silver—that is a stable protective layer. It preserves the metal underneath and, on a coin, it often carries the surface detail that identifies the object: the date, the inscription, the portrait. While some objects arrive with corrosion that is part of the find, this patina is vital.
The damage that aggressive cleaning causes is permanent. Once surface detail is scratched away, it cannot be brought back. Aggressive scrubbing with a fingernail, a standard toothbrush, or worst of all, wire wool, removes the patina and any identifying detail in a single pass. A Victorian penny scrubbed clean might look shinier, but if you’ve rubbed away the date and the legend, you’ve reduced it from a datable coin to a lump of copper.
There is also a legal dimension. Potential Treasure must be reported to a coroner, often with help from a local Finds Liaison Officer. If you clean a potentially significant find before anyone has seen it, you may be destroying the very details that determine whether it qualifies as treasure in the first place. The reporting obligation exists separately from the cleaning question, but they interact, and the order matters.
Most finds pulled from a park or a field are common. But you do not know that until you have identified the find—and cleaning it first can destroy the evidence that makes identification possible.
A Step-by-Step Guide for Common Finds
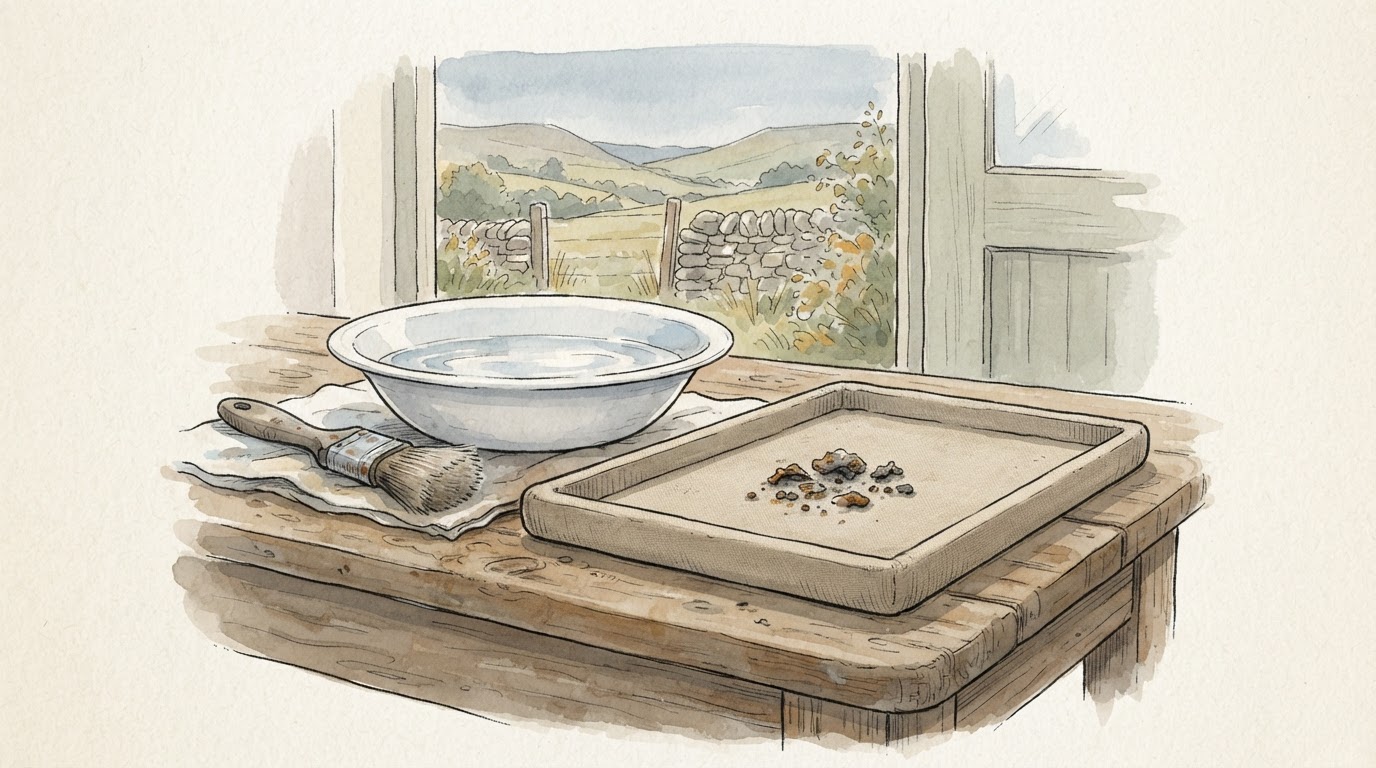
For finds confirmed as common—modern coins, bottle caps, unremarkable metal objects—and that are not subject to any Treasure Act reporting obligation, the safest method requires nothing more than distilled water and a soft brush.
Submerge the find in distilled water to soften the dirt. This allows for removal without the chemical reactions that tap water’s minerals can sometimes cause over the long term.
Once the dirt is softened, use a soft-bristled brush—a soft toothbrush or a dedicated coin brush—to gently lift away the loosened material. The key is the bristle hardness: soft bristles remove softened dirt without scratching the patina. You are not trying to remove the patina; you are trying to remove the dirt sitting on top of it.
After soaking and brushing, pat the find dry with a soft cloth or paper towel. Do not leave it to air dry in direct sunlight or near a heat source.
Here is the protocol in full:
- Soak: Place the find in a container of distilled water. Leave it for longer if the find is heavily encrusted.
- Brush: Using a soft-bristled brush, gently work the softened dirt away. Do not press hard. If it is not coming away easily, leave it to soak longer.
- Dry: Pat dry with a soft cloth. Allow it to finish drying naturally, away from direct heat or sunlight.
What not to use: vinegar, lemon juice, bleach, wire brushes, electrochemical cleaning kits, or any abrasive method. These all remove or damage the patina irreversibly. Vinegar and lemon juice are acidic; they dissolve copper compounds in the metal surface and will eat into the detail on a coin. Electrolysis strips the patina entirely. Wire wool scratches the surface and removes any remaining surface detail.
The honest answer is that the protocol is mostly waiting. The time investment is what protects the find, not any special skill or equipment.
Choosing the Right Equipment
For everyday finds, the equipment you need is minimal. A soft-bristled coin brush is a good everyday tool for routine cleaning. Soft bristles remove softened dirt without scratching the patina, it is reusable, and it costs very little. For most common finds, that is all you need alongside a cup of distilled water.
A spray bottle filled with distilled water can be useful for light, even application of moisture during or after excavation, removing surface dirt without physical contact. This is helpful on fragile or partially buried objects. It won’t shift heavy encrustation on its own.
Fiberglass cleaning pens are designed for intricate finds with deep cracks and crevices—the kind of detail found on ornate buckles or military buttons. They can remove dirt from fine crevices, but the tip can damage soft patina if pressed too hard. They should be used with caution and only after soaking.
For most beginners, a soft toothbrush and distilled water will handle common finds safely. Specialist tools become worth adding as your collection grows. The principle does not change: gentle, patient, moisture-based methods beat aggressive ones every time.
Knowing When to Stop and Seek Help
There are two situations where DIY cleaning is the wrong call.
The first is when the find is heavily corroded or fragile. DIY methods can cause it to crumble; the corrosion has weakened the underlying metal, and brushing or even handling can cause it to break apart. If you have a find that looks like it might fall apart if you touch it, stop and seek professional advice.
The second is when the find might be subject to the Treasure Act 1996. Do not clean it. Contact your local Finds Liaison Officer first. Professional conservation is the only safe option for high-value or delicate items, and the FLO will be able to advise on whether the find needs to be reported and what the next steps are.
For guidance on significant finds, the Portable Antiquities Scheme at finds.org.uk is the first port of call. They can put you in touch with your local FLO and walk you through the reporting process.
A Final Note on Preservation
Unlike a misidentified signal or a poorly reinstated plug, over-cleaning a find is a mistake that cannot be undone. Once the surface detail is gone, it is gone for good. For any object where that detail might matter, the only safe path is professional conservation through your local Finds Liaison Officer.
Once you have the cleaning approach sorted, the next step is making sure you are detecting legally. That means confirming you have permission to detect the land—not just assuming it is fine because you can walk there—and understanding what the Treasure Act actually requires you to report. Our free checklist covers both of these in plain terms: Get the Free Metal Detecting Permission & Reporting Checklist . It is the practical next step after reading this.
Work carefully, identify first, and when in doubt, stop and ask.
This article provides general guidance. For specific conservation advice concerning valuable finds, consult a qualified conservator or Finds Liaison Officer.
Explore More Topics
Go deeper on specific topics:
- How to Identify Old Coins Found Metal Detecting
- Hammered Coin vs Milled Coin: How to Tell the Difference
- How to Preserve Patina on Metal Detecting Coins
- How to Store and Display Your Metal Detecting Finds